Getting started
This page takes you from a new account to a live workspace. Plan for an hour if your Stripe account and your site are at hand.
Until you go live, Chargeless refunds and cancels nothing: requests are declined automatically ("Your workspace is not live yet, so nothing runs automatically") and disputes go to your team.
1. Create your account
By invitation. If a teammate invited you, open the link in the email ("Join {workspace} on Chargeless"). It is valid for 7 days and only for the invited address. New users choose Create Account and Join; existing users choose Sign In to Accept.
By signing up. On Create Your Chargeless Account, enter your name, email and a password (at least 12 characters), accept the Terms of Service and confirm you have read the Privacy Notice. We send a verification link (valid for 24 hours, usable once); open it and enter your password again to confirm the address. You cannot sign in before the address is confirmed.
Self sign-up may be turned off on a deployment; the page then says "Sign-up is by invitation". Ask Chargeless for an invitation.
With Google. Continue with Google works for Gmail and Google Workspace addresses.
Turn on two-factor authentication now
Go to Security (under Account) → Two-factor Authentication → Set Up, scan the code with an authenticator app and store the 10 Recovery Codes somewhere safe. Two-factor is optional for signing in, but several sensitive actions require an authenticator code: storing your Stripe keys, rotating signing secrets, adding webhook endpoints and going beyond the policy. Without two-factor you cannot do them at all. See Security and safety.
2. Create a workspace
A workspace is one business: its payment connections, policy, team, tickets and settings. On Create a Workspace, enter the Workspace name and your Main currency (the currency your policy's limits start in; you add limits for your other currencies later, on the Policy page). It cannot be changed later. You become its owner.
A test workspace. To build and try an integration without real money, turn on Test workspace when you create it. A test workspace connects only test-mode payment accounts (Stripe test keys, a Paddle sandbox, an Adyen test account and the like), and its API keys start with
sr_test_. Everything else works as in a live workspace. A workspace stays test or live for good: create one of each.
You then land on Get Started, the go-live checklist ("Get {workspace} Ready to Go Live"). It shows "{done} of {total} required steps done".
3. Work through the checklist
Connect Stripe (required)
Paste your Stripe secret key and the webhook signing secret of the webhook endpoint you create in Stripe for Chargeless. The panel shows the webhook address to enter in Stripe. Storing keys asks for your authenticator code. See Integrations → Stripe.
Running your own payment system? Choose Use your own payment system instead. The step becomes Connect Your Payment System: your API address, credentials and a contract check that must pass. A second required step follows, Attest the Conformance Kit's Report: upload a passed run of our conformance kit (providercheck) over your transport, at most 30 days old. See Integrations → Your own payment system.
Phase 1: Stripe is the only payment service provider Chargeless connects to directly. dLocal and Ecommpay are not available yet.
Publish a Policy (required)
Open Policy. If nothing is published yet, the editor starts from the Balanced preset. Its amounts are in your main currency, with the preset's numbers (they are not converted, so review them). If you sell in other currencies too, add limits for them under Currencies You Charge In. In short, the preset:
- refunds automatically up to 100.00 for charges at most 14 days old, partial refunds allowed, for the reasons charged twice, forgot to cancel, doesn't recognise the charge and not as described;
- allows two refunds per customer per 90 days, and at most 2,000.00 per hour and 200 refunds per day for the workspace, with the circuit breaker at 5 times the usual rate;
- always allows cancellations, and offers a refund of the last charge to customers who forgot to cancel within 7 days;
- refunds fraud-warned charges up to 250.00 and cancels the subscription;
- accepts disputes under 25.00 and submits evidence for the rest, 48 hours before the deadline;
- has one custom rule that declines refunds of credits the customer has already used.
Adjust it to your business, then Publish. See Write and publish your policy.
Try the Simulator (optional)
Replay your draft over your recent history to see what it would have done. It is marked "Not tracked" and never blocks going live. See the Simulator.
Choose Where Handoffs Go (required)
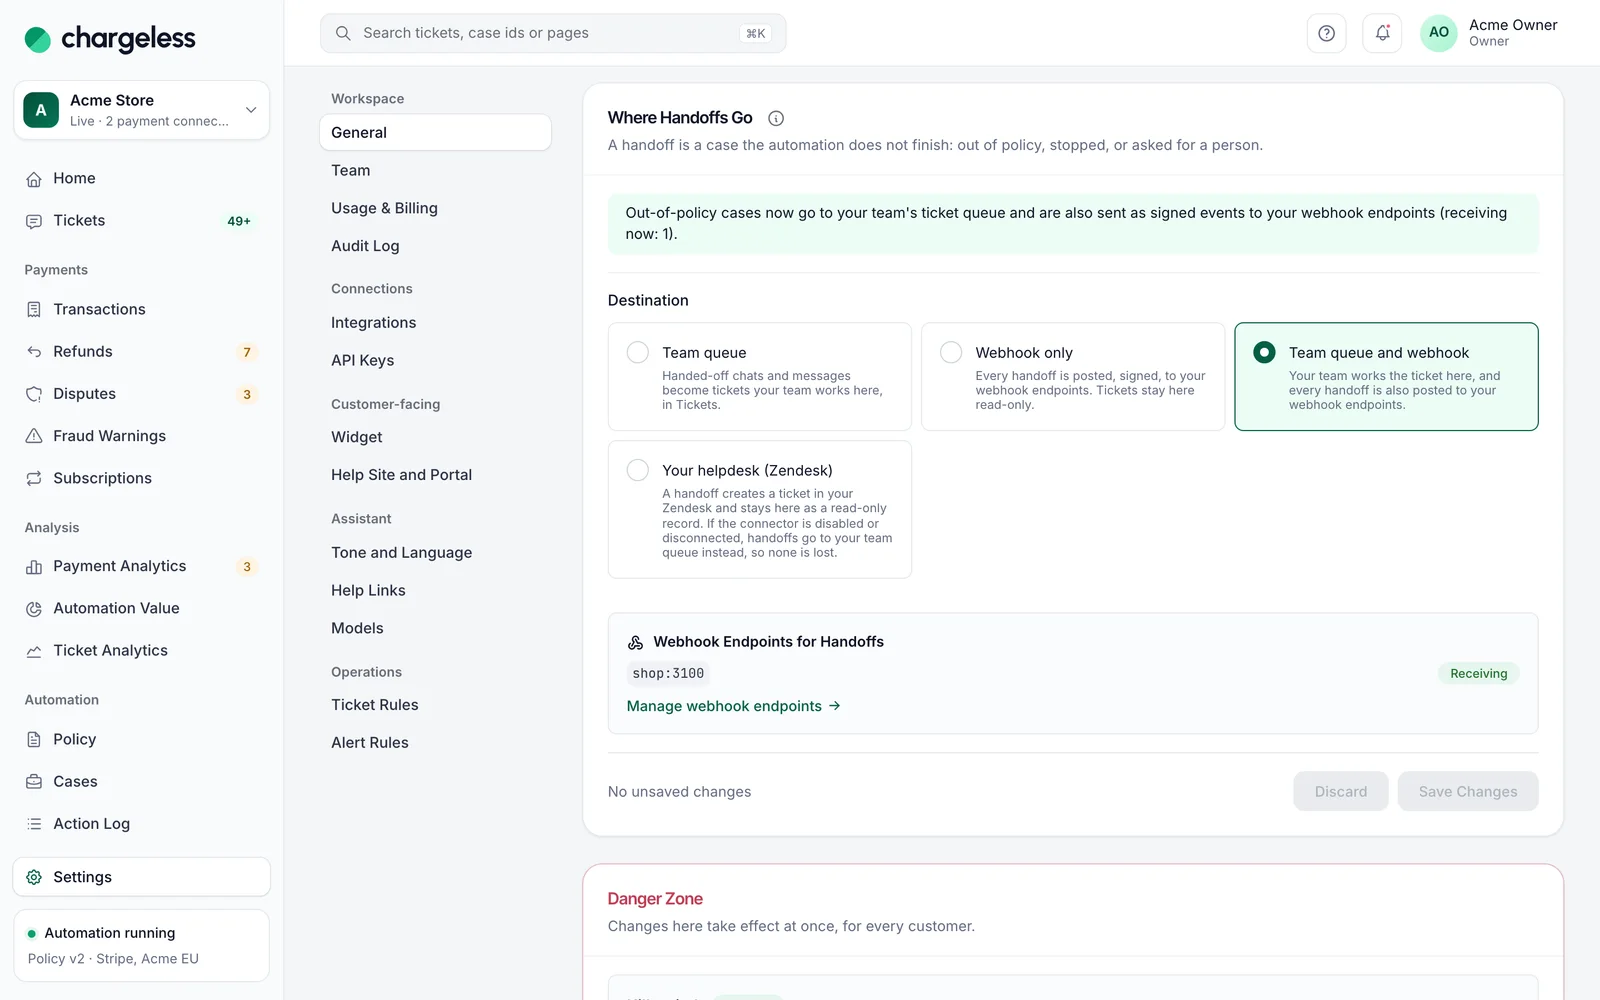
Anything the automation does not resolve is handed off. Choose where it goes:
- The team queue: tickets in the panel, answered by your team (see Tickets).
- A signed webhook: to your own system (see Webhooks).
- Both.
- Your helpdesk (Zendesk), once Zendesk is connected (see Zendesk).
Allow Your Shop's Pages (optional)
List the origins (for example https://shop.example.com) where the chat widget may appear. Only needed for the chat widget; you can do it later in Settings → Widget. See Widget and identity.
4. Go live
When every required step is done, an owner or admin chooses Go Live, confirms "Take {workspace} live?" and chooses Go Live Now. Going live asks you to confirm it's you.
Chargeless checks everything again at that moment:
- Stripe: the stored key must work now (one read-only call). If Stripe cannot be reached, nothing changes and you can try again.
- Your own system: the full contract check runs live, and the conformance report must be at most 30 days old.
- A policy is published and a handoff destination is chosen.
Anything missing is listed under "Not live yet. Still missing:".
History to import (Stripe)
When you go live on Stripe, choose how much history to import: the last 24 hours, the last 7 days, or 30, 90, 180 or 365 days (a window of 24 hours or 7 days brings in only the subscriptions that started inside it) (90 is preselected; a Stripe connection added later can also import none). Chargeless imports your customers, current subscriptions, charges and disputes from that window, so customers can ask about past charges from day one. It also reads about 13 months of payment attempts, refunds and early fraud warnings for the Payments views and Payment Analytics. Open disputes found during the import are handed to your team. A progress card on Home shows the import; after it finishes, Stripe's webhooks keep everything current.
With your own payment system there is no import window: Chargeless reads fresh data from your system before every decision.
5. After go-live
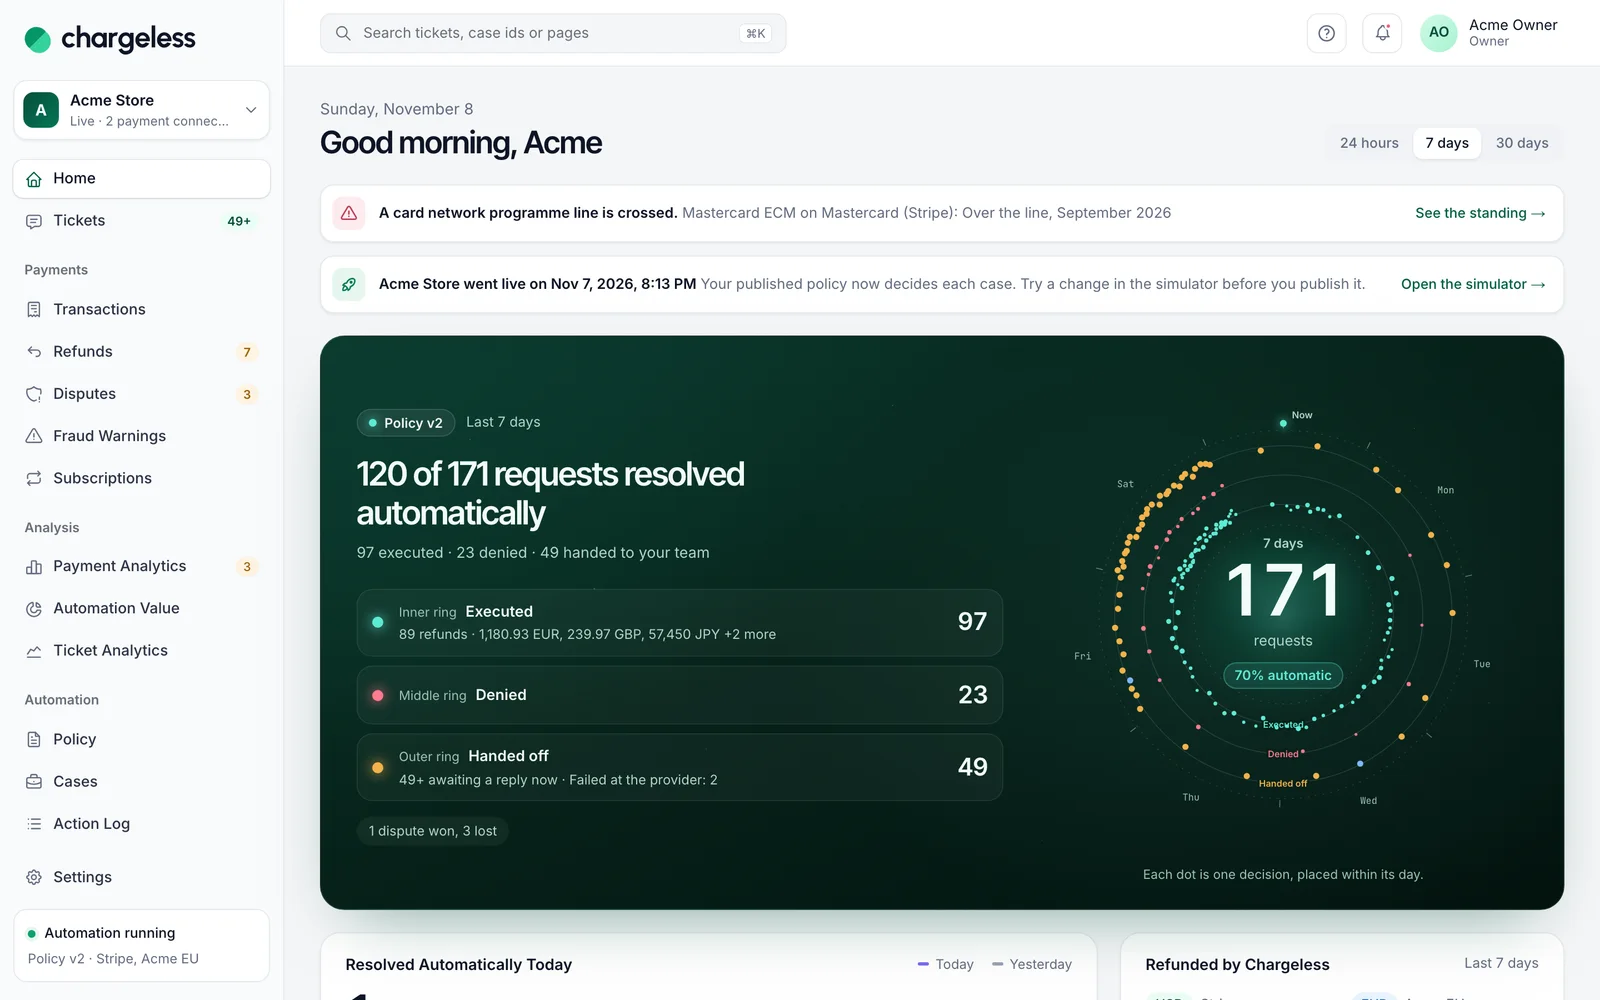
Home shows "{workspace} went live on {date}" for a week, with a link to the simulator. From now on your published policy decides each case.
Your first day checklist
- Ask a test question in the widget on your own site, as a customer would.
- Open the Action Log and click the decision: every check it passed is listed.
- Hand something off on purpose (ask for a person in the chat) and find the ticket under Tickets → New.
- Send a test event to your webhook endpoint, if you use one.
- Check Settings → General → Kill switch and make sure everyone on the team knows where it is.
Next steps:
- Embed the widget on your site.
- Invite your team.
- Connect your helpdesk or an email inbox so email requests reach Chargeless.
- Bookmark Troubleshooting.
Workspace limits. You can own up to 3 workspaces that are not live yet. If you belong to a workspace Chargeless has suspended, you cannot create a new workspace or take one live.